Get here fresh and working tricks. You can also find here best tricks, widgets, templates, tutorial and seo tips and other many interesting things related to Blogger and Wordpress. Subscribe us and stay connected with us

Showing posts with label Blogging. Show all posts

Tuesday, July 29, 2014

Tag Style Cloud Label Widget For Blogger


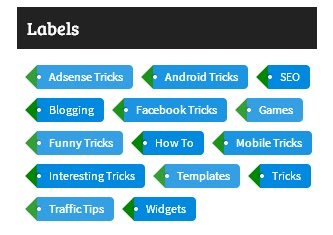
Label widget is most important widget in blogger. With this your blog's readers can visit all categories. If it is cool and good looking then it will attract your visitor and they come again and again and again to your blog. It will also increase your blog's page views. Your audience will surely impressed by adding this on your blog. It also helps you show your blog like as professional & stylish blog. Its color coding is so nice. You can check it's preview on my blog. We are using this on our blog. This is so nice widget.

How to add this on Blogger blog?

  • Go to Layout and Add A Widget.
  • Select Labels and on fourth option (Display) select Cloud.
  • Now navigate to template option in left sidebar.
  • Press Edit HTML button to add this style.
  • Find ]]></b:skin>
  • Copy below code and paste it before the ]]></b:skin>.
.label-size{

margin:0;
padding:0;
position:relative;
}
.label-size a{
float:left;
height:24px;
line-height:24px;
position:relative;
font-size:12px;
margin-bottom: 9px;
margin-left:20px;
padding:0 10px 0 12px;
background:#0089e0;
color:#fff;
text-decoration:none;
-moz-border-radius-bottomright:4px;
-webkit-border-bottom-right-radius:4px;
border-bottom-right-radius:4px;
-moz-border-radius-topright:4px;
-webkit-border-top-right-radius:4px;
border-top-right-radius:4px;
}
.label-size a:before{
content:"";
float:left;
position:absolute;
top:0;
left:-12px;
width:0;
height:0;
border-color:transparent #008900 transparent transparent;
border-style:solid;
border-width:12px 12px 12px 0;
}
.label-size a:after{
content:"";
position:absolute;
top:10px;
left:0;
float:left;
width:4px;
height:4px;
-moz-border-radius:2px;
-webkit-border-radius:2px;
border-radius:2px;
background:#fff;
-moz-box-shadow:-1px -1px 2px #004977;
-webkit-box-shadow:-1px -1px 2px #004977;
box-shadow:-1px -1px 2px #004977;
}
.label-size a:hover{background:#555;}
.label-size a:hover:before{border-color:transparent #555;}

  •  Now Save Template and see your blog it will be added to your blog. 


Final Words

Hope your blog is looking good with this widget. If you face any problem in adding this on your blog then comment below we are here to help you. Also share it with your friends to help us.


Monday, July 28, 2014

5 Best Places For Sharing Your Blog Posts


Are you a blogger? And you want to get traffic on your blog? Then i will tell you how you can get traffic. Every blogger want to get more and genuine traffic to his/her website and mostly bloggers are using Facebook and Twitter. These sites are social media sites. From these sites getting traffic is so much difficult. Apart from these, there are many other websites are available for sharing purpose. You can easily share your content on these websites and can get a good result of traffic. Here we create a list of top 5 sites list. 

These sites will help you very much in getting traffic. But always write good and attractive blog posts. Then readers will surely come on your blog.

Top 5 Best Post Sharing Websites.


1. Newsvine

This site was launched in 2006. More than 40 million users of a single month. If your blog is about news, Then newsvine is perfect and best place for you to get best amount of traffic. You can also get all world's news on it and know more about world.

2. Reddit

Reddit was started in 2005 and it is superb place to share articles and blog posts. You can post your content in different categories. Reddit shares technology,books, entertainment stuffs, gaming, pics and much more things on their platform. For every blogger this perfect and best place. Register on this site now and increase your traffic with unique visitor.

3. Stumbleupon

This is also a best place to share your blog;s post. It is totally free and like other website it is also a social networking site. When you submit your site it will send many visitors to your site and also increase your blog's alexa rank.

4. Digg

Digg is best place to find new and fresh stories on internet. You can see here many articles and stuff related to technology, social medias, science and about news. So many peoples are on digg so registered here today and let world to know about your blog.

5. Kingged

Kingged.com is best place to share your posts and you can also earn money from this site. Yes they will pay you when you will comment on other posts. This site is started in 2012 and sharing stuff about internet, make money online, blogging, science, technology, SEO and much more interesting things.

Final Words

Hope my article helps you. Firstly i tested these website and these website works perfectly. These platforms send you very good traffic amount and help your blog. Please respect my hard work by sharing it with your friends and also subscribe us.


Saturday, July 26, 2014

How To Add A Twitter Feeds Widget In Blogger Blog.

Hey bloggers, all of you know the importance of social media for blogging. This is a main part of our blogging life.From social networks you can drove a hug amount of traffic to your website or blog. The social networks helps us to earn money and good traffic. They also increase our site's rank. You can put or add many type of social media button such of Facebook, Twitter, Youtube, Pinterest, Reddit, Stumbleupon etc. With these they can easily share your post on their account and can help you for getting more traffic on your blog. 

Twitter is a best place for getting good traffic. Mostly bloggers using this and getting good views on their site. Now twitter team design a widget. With this widget you can show your twitter feeds on your blog easily. This widget is like Facebook fanbox but it shows feeds.

About Widget

This widget is spam free and it is official feeds widget designed by twitter. It will displays your recently published feeds. Best things is that it contains a follow button on it's top corner. So your readers can also follow you easily on twitter. It also has a box where your readers can also tweet you without leaving your post.

Read below how to add this widget on your blog.

  • Go to this link and fill the requirements. {Widget}
  1. Enter your twitter username.
  2. Choose options those you want to enable.
  3. Set Height and Theme according to your blog.
  4. Set color of links.
  5. Do these steps and check them.
  6. Now hit Save Changes button.
  7. Copy the code.
  • Now go blogger's layout and Add A Widget.
  • Navigate to HTML/JavaScripts and paste the code and Gave the title whatever you want or leave it blank.

  • Finally, You got the feeds widget on your blog. Click on orange button and see your blog.

Final Words 

Congratulations for your new feeds widget. Tell me how is looking your feeds widget on your blog? Your readers will love it and it also make your blog more beautiful. You'll also get new followers from it. If any issue you face while installing it then comment we are there to help you. But share it also with your friends to help me and them.


Thursday, May 8, 2014

How To Show Sitemap Page On Blogger


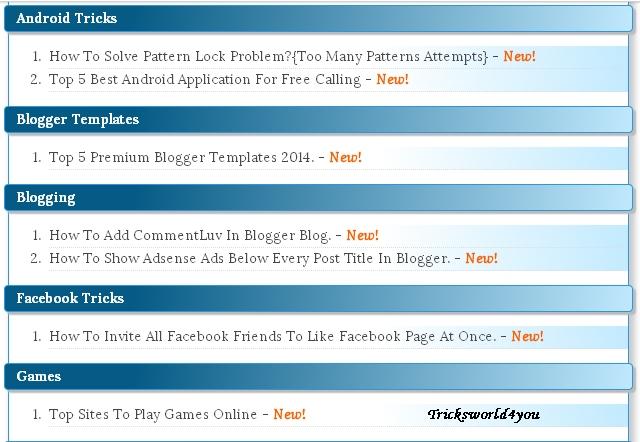
Sitemap is not a necessary thing for your blog. It only shows the list of all your site's posts. But in a stylish look it is very useful. Anybody can see all your published posts on sitemap page. It also helping to crawling and indexing your blog's post and pages. It also helps in improving page rank of your blog. See below how you can add and show it on your blog. This sitemap is stylish and good looking. When you add this on your blog this will automatically show posts in categories by specific label. Color scheme of this sitemap is blue. This is a simple sitemap.

Create Sitemap Page

- Open Blogger and Login.
- Go to Pages option.
- Click on New Page Button at Top and Enter Sitemap In Title.
- Click on HTML Tab and Paste The Below Given Code.
<div dir="ltr" style="text-align: left;" trbidi="on"><style type="text/css">#toc{width:99%;margin:5px auto;border:1px solid #2D96DF;-webkit-box-shadow:4px 4px 8px 2px rgba(0,0,0, 0.2);-moz-box-shadow:4px 4px 8px 2px rgba(0,0,0, 0.2);box-shadow:4px 4px 8px 2px rgba(0,0,0, 0.2);}.labl{color:#FF5F00;font-weight:bold;margin:0 -5px;padding:1px 0 2px 11px;background:-moz-linear-gradient(right,#C2EAFE 0%,#055A85 40%);background:-webkit-gradient(linear,left 10,right 80,color-stop(0.20,#055A85),color-stop(1,#C2EAFE));border:1px solid #2D96DF;border-radius:4px;-moz-border-radius:4px;-webkit-border-radius:4px;box-shadow:3px 3px 1px #bbb;-moz-box-shadow:3px 3px 1px #bbb;-webkit-box-shadow:3px 3px 1px #bbb;display:block;}.labl a{color:#fff;}.labl:first-letter{text-transform:uppercase;}.new{color:#FF5F00;font-weight:bold;font-style:italic;}.postname{font-weight:normal;background:-moz-linear-radient(right,#C2EAFE 0%,#fff 40%);background:-webkit-gradient(linear,left 80,right 10,color-stop(0.60,#fff),color-stop(1,#C2EAFE));}.postname li{border-bottom: #ddd 1px dotted;margin-right:5px}</style><br /><div id="toc"><script src="https://googledrive.com/host/0ByNodV_m9cVLR0pmWFgwZ1NmdW8/" type="text/javascript"></script><script src="http://tricksworld4you.blogspot.com/feeds/posts/default?max-results=9999&amp;alt=json-in-script&amp;callback=loadtoc"></script></div></div>

- Replace http://tricksworld4you.blogspot.com/ With Your Blog's Address.
- Now Publish This page.


You done all steps and now you have create sitemap for your blog. Any problem then comment below. Also share it with others if you think this useful and help us by sharing.


Thursday, May 1, 2014

How to fix Blogger Image Color Changing Issue After Uploading

11:35 AM By Unknown , ,


Recently i see a new problem in blogger. When we add images in our post then colors of images changes automatically. That is very bad for our site and it throws bad impression on our visitors. So for our safety i sarch about it and find the perfect and working result for this problem. It is so simple to fix this issue.

Why This Happens?

This happens because of our Google+ Settings. Our blogger account is connected with Google Plus and it automatically enhancing the images. 

Disable This Feature.

  • First Go To Settings Page.
  • Now Find Auto Enhacne Option and Click On Off.
  • Now You Done.
This is working method. Now your google plus settings are changed and saved and your images will not changes their colors. You can also change this option any time to Normal or High. Enjoy with original image quality.


How To Add Alexa Rank Widget To Blogger For Free

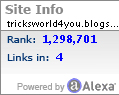
In this post we tell you how you can add Alexa Rank Widget to your blogger blog. To increase your alexa rank you have to add this widget in your site. This is so simple to add this on your blog and this widget tells about your blog's rank and backlinks. You can add a simple and beautiful rectangle alexa widget box and can show your blog's pange rank and backilinks to your visitors. Look below and see how you can add this widget.

Benefits:-

Main benefit of adding this widget is that you can increase your blog's rank. People can easily redirect to your blog's alexa info when they click on this box. If a large number of peoples click on this box then you will became more popular in alexa ranking. A other benefit is that you can also check your blog's rank on your site.

Steps For Adding:-

  • Open your blogger account and go to Layout.
  • Then click on Add A Gadget Button.
  • Choose HTML/Javascripts option.
  • Copy the below given code and paste it into the box.
  • Replace Tricks World 4 You with your blog's address.

<a href="http://www.alexa.com/siteinfo/Tricks World 4 You"><script type='text/javascript' src='http://xslt.alexa.com/site_stats/js/s/a?url=Tricks World 4 You'></script></a>
  • Now save button and check your blog you will find the widget.


Tuesday, February 4, 2014

How To Add CommentLuv In Blogger Blog.

10:31 AM By Unknown , ,


Hey Bloggers, in this post you will learn how you can add commentluv to your blog on blogger platform. All of you defiantly know that commentluv is a plugin that comes first for wordpress platform. But now you can also use this on blogger. Commentluv is best commenting system. It attracts visitor to comment on your posts and you can get many comments. All of us know the imprtance of commenting. Wordpress users can easily add commentluv plugin to their blog but this is difficult to the blogger user. Do not loose heart i know how to add this and i share it below with full details see below and use commentluv on your blogger blog.

  • Open This Site Intensedebate.com
  • Create A Account And Verify It.
  • In Right Sidebar Click On Install Intensedebate Under Manage blogs/site.
  • Then Enter Your Blog's Url In Box And Hit Green Button.
  • Now Click On Blogger Button.

  • Upload Your Blog's Template If You Don't Have Your Blog's Template Then Save It By Going To Template Then Backup/Restore Now Download Full Template.

  • Now Click On Upload And They Will Gave You A Code Copy It And Paste This In To Template Then Edit HTML And Replace The All Code With The New One That You Copied From Intensedebate.

  • Now Select Your Site From Top Site Button And Click Plugins Then Scroll The Page And Find CommentLuv. Click On Active And You Done.

This system is very best system. This tutorial is working and very easy. If you like this then share this and comment something for us. If you have any problem while installing this then comment we will help you.


Thursday, January 23, 2014

How To Show Adsense Ads Below Every Post Title In Blogger.


Hey Bloggers everyone want to earn a lot of money with adsense because this is best monetizing website on internet to earn a lot of money . But for this you have to putt your ads on right place. Some of you put ads between the post that is very dangerous. The AdSense team take it as risk and they will also disable your account so do not place ads between the post. This is clearly mentioned in their privacy policies page read them carefully. To avoid this risk place the ads under the title of your post. By doing this you will also get more clicks on ads. But now some bloggers don't know that how to place the adsense ads below the post title so see below to know this.

Step By Step Instructions To Do This.

  • First create a ad from your adsense account.We suggest you to choose a Rectangle or Square Ad Unit to get better result.
  • Then Covert Your Code From This Blog. Covert Code Here
  • Now open your blogger template menu then go to edit html.
  • Then find here he below given code by pressing CTRL+F.
<data:post.body/>

  •  Then copy the below given code and paste it above the <data:post.body/> Replace the paste your code with converted code.
<b:if cond='data:blog.pageType == &quot;item&quot;'><center>  Paste your code </center> <br/> <br/> </b:if>

  •  Now save the template and open your any post you will see the ad below the title. Some time it takes 30-40 seconds to show.
Some Other Blog Are Saying That Paste The Code Below The Code <data:post.body/> But They Are Wrong. To Show The Ad Below The Post Title You Have To Paste AdSense Code Above This Code.

This Trick Is Working If You Have Any Query About It Then Comment Below Or Contact Us. Check Other Posts Also On This Blog To Know More. Please Also Share This With Your Friends And Also Join Us On Facebook.


Wednesday, January 15, 2014

Top 5 Premium Blogger Templates 2014.

8:52 AM By Unknown ,

Hello guys we are posting the best and top 10 premium blogger template of year 2014 in this post. Because this is very important to install a best and responsive template on our blog, because we can get lots of traffic if we have a god looking blog and our old traffic will also stay with us if we have a perfect blog. So template is main part to create our blog perfect. We create a list of top 10 templates below and you can know all about them. We know that millions of templates for blogger are available on internet and it's too hard to choose right template for our blog. So we find the best templates and create a list of them. Some templates are never seen on internet before so enjoy the latest templates.


1. Codify Magazine Blogger Template.


About Template :- This template is provided by Templateify.com and this template is fully responsive, seo optimized and fast loading template. This template is designed for magazine blogs but you can also use this template for news and technology blogs. In this template they two columns and 4 footer columns. It is a nice colored template.

2. Geeks Gadgets Blogger Template.


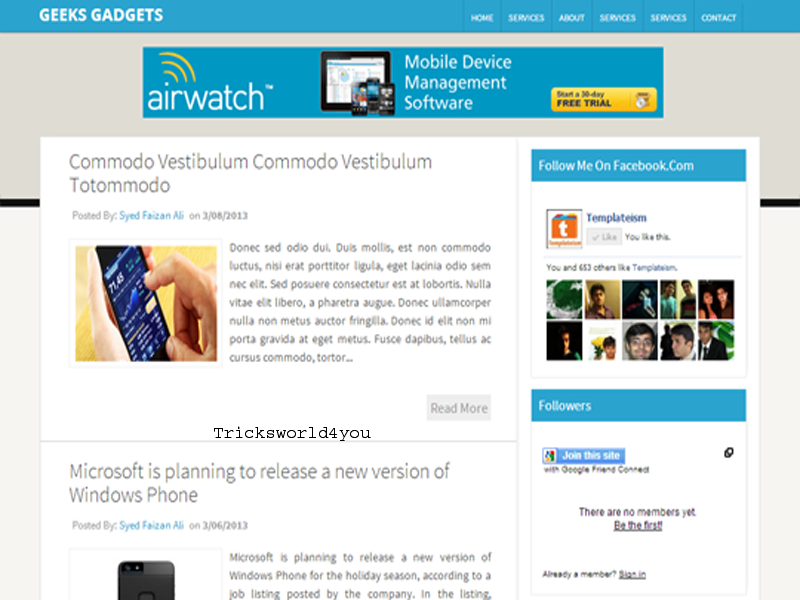
About Template :- This template is available on Temlateism.com and it is 3rd pro designed template by them. It is fast loading, SEO friendly template. It has Social Sharing Buttons also those appear below the post title. It has two columns footer and sidebar. You can use this template for Technology and Multimedia Blogs.

3.  GoGreen Blogger Template


About Template :- This is also a template that is provided by templateism.com and you can download it for free. It fast loading template and seo-friendly too. It is very good template.

4. Maggner Magazine Blogger Template


About Template :- This template is provided bu Templateify.com and its a ads-ready template. It has header and right sidebar slots to place ads. It is also a SEO-friendly and fast loading template. In this template you will get 2 columns sidebar and 4 columns footer. It is mostly used for Technology and Multimedia Blogs.

5. Fabric Blogger Template


About Template :- This template is provided by Templateism.com and they designed this template for house and furniture collection blogs. It is SEO-friendly also and has threaded comment style. They include Social Sharing Buttons, Related Posts widgets and 3 Columns footer in it.

Note: Please do not remove attributions from any template because they designed it by very hard working so respect their hard work and gave them some credits. Which templates are provided by Templateify, if you remove the attribution from them then your blog will be redirect to their site so be careful and don't remove it. 

If you have any query then comment below we will help you and also share it with your friends. To get more things subscribe us also.